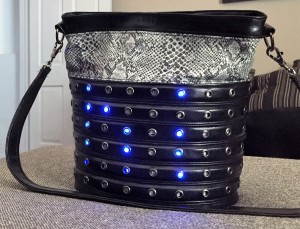
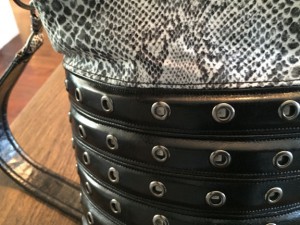
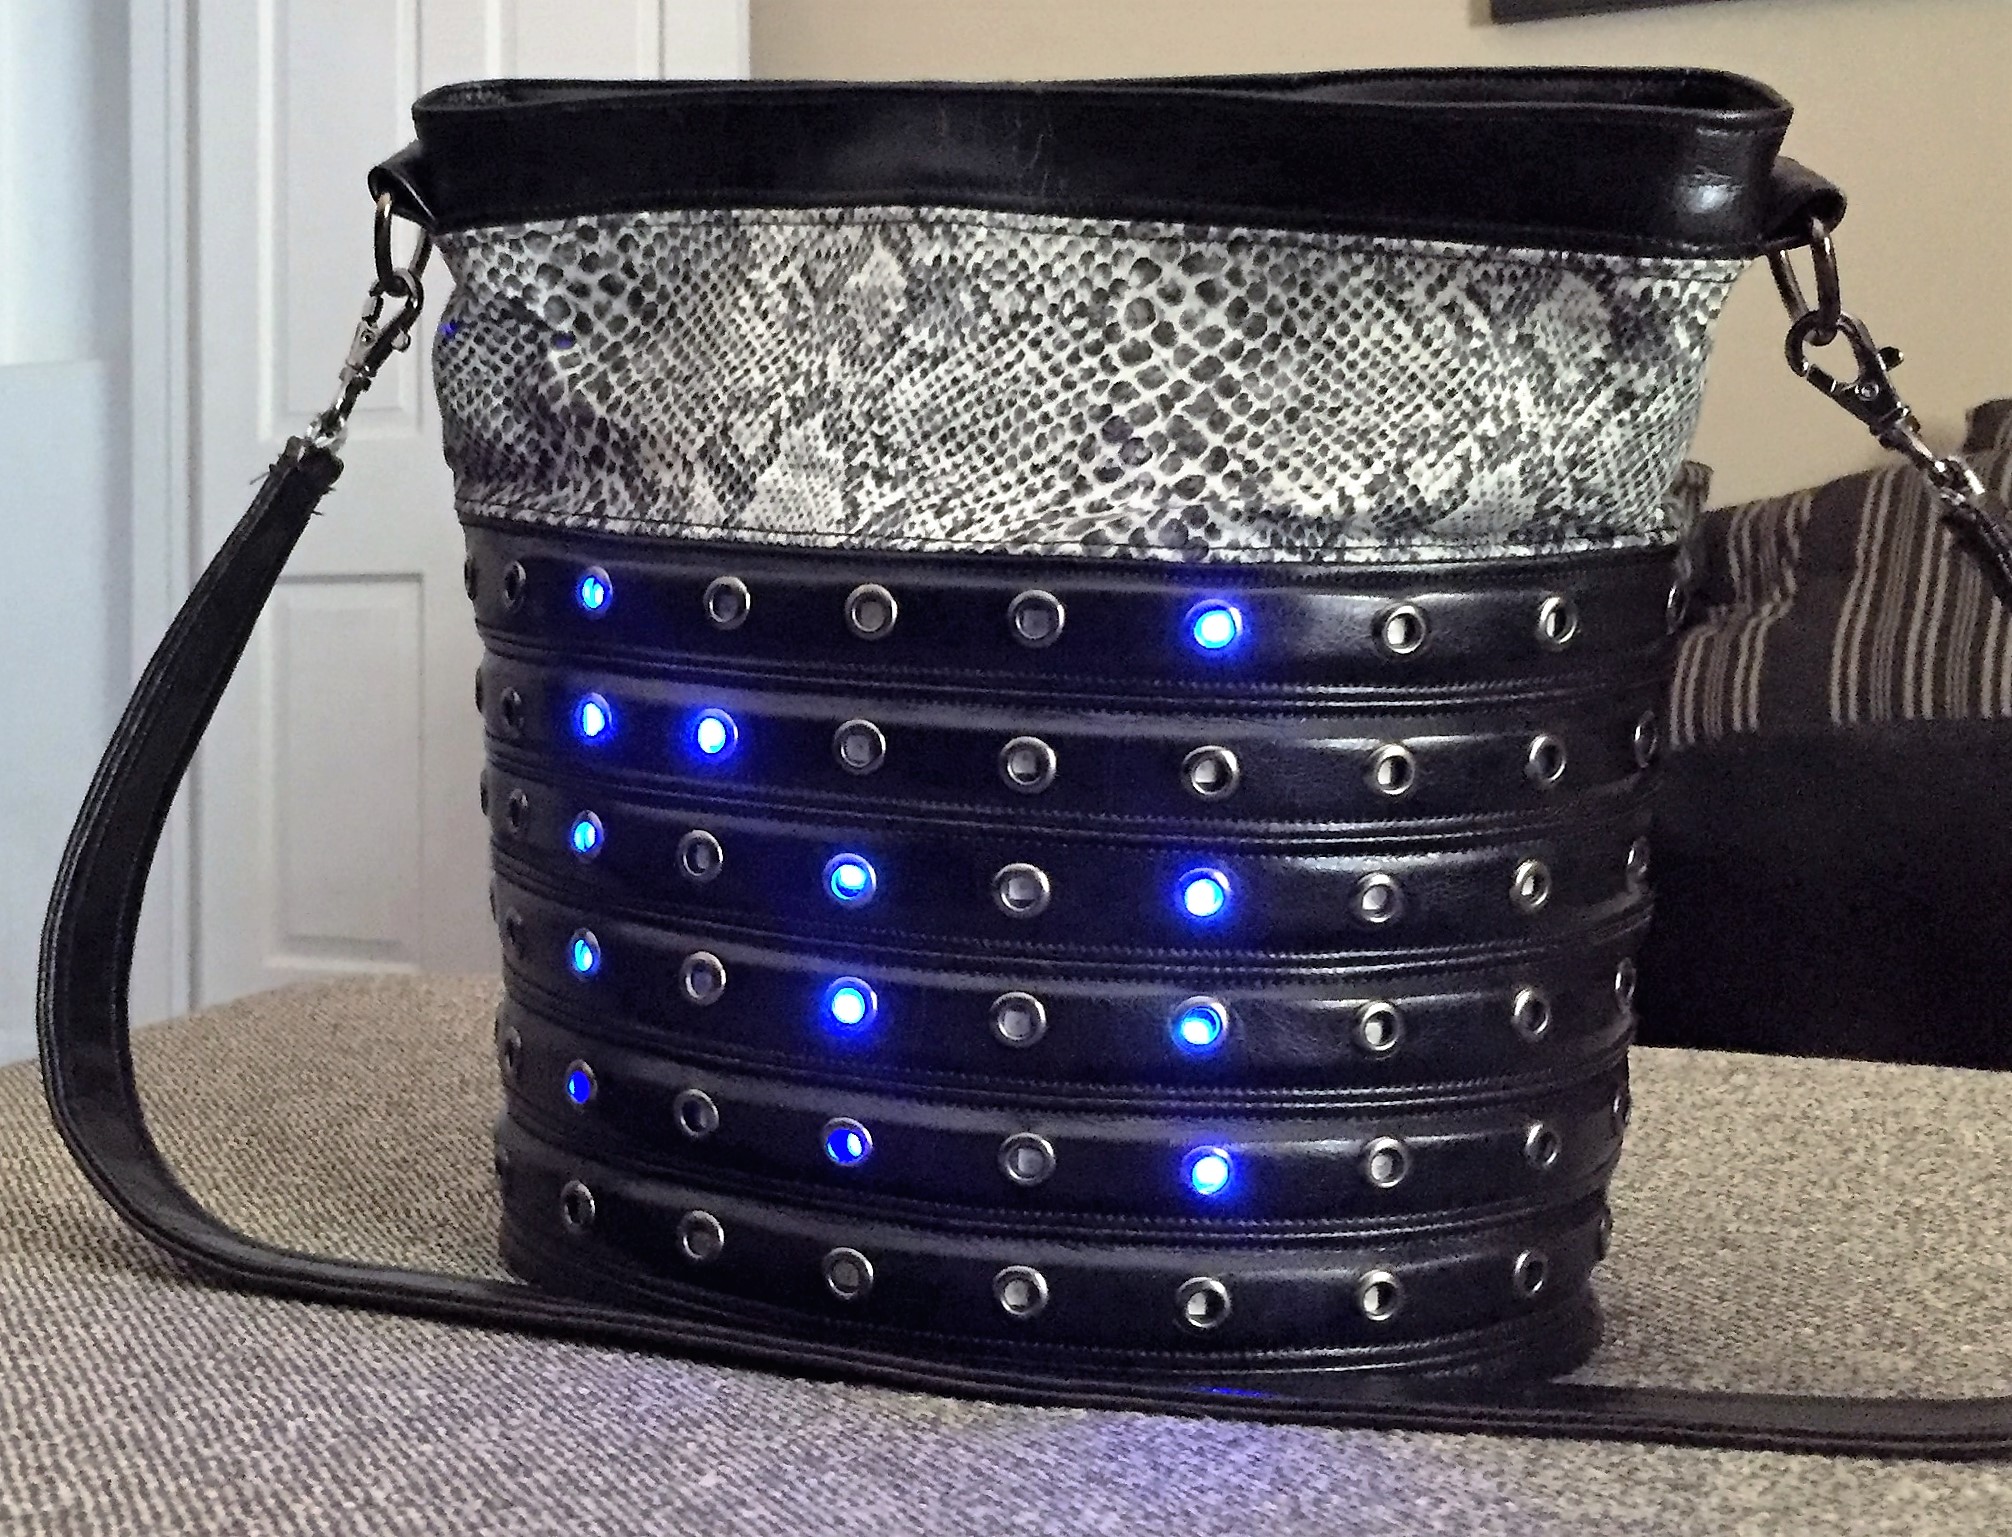
My goal with this project was to create a wearable electronics project that incorporated the electronics in an organic and subtle way. The end result is a handbag containing a programmable 10×6 LED matrix hidden inside the lining, with the LEDs visible from behind metal eyelets. The LED matrix is controlled by a Teensy 3.2,which connects to an iPhone via an Adafruit BlueFruit BLE UART Friend. The Adafruit Bluefruit App on the iPhone subscribes to a MQTT feed (from Adafruit.io in this case), which streams data culled from Twitter via IFTTT. Any tweets with the hashtag “#wearables” have their Twitter handle displayed on the handbag’s LED matrix. Video demonstration below:
Inspiration:
Inspiration for the design of this project came from this attractive sound reactive skirt, which hid the electronics but allowed the LEDs to shine through eyelets. Additionally two sewing blogs on leather-bottom tote construction and bucket bag construction provided extremely helpful guidance for the handbag design. I got the idea of MQTT connected LEDs from Dr. Lucy Rogers’ Cheerlights connected cast. Many tutorials on the Adafruit site (Adafruit DotStar LEDs, Bluefruit Connect for iOS, Bluefruit UART le Friend, Adafruit.io MQTT api) were very helpful in setting up and programming the electronics and connecting to an MQTT feed.
Contents:
This is a REALLY long post – most of which covers the construction of the handbag, but the table of contents below can help you skip to the parts that interest you.
Making the LED Matrix:
LED Matrix Components:
- 3 meters of 30 LEDs/meter APA102c LED strips in waterproof silicone casing (Dotstar)
- 6 Male & 6 Female 4-wire JST connectors
- Soldering iron and solder
- 1/2″ shrink tubing
- Breadboard, wires, and Arduino compatible microcontroller for testing
The LED Strips:
The 10 × 6 LED matrix is constructed from Adafruit DotStar RGB LED strips. These strips are available from other sources as APA102C LED strips. The Adafruit strips come in a clear silicone weatherproof sleeve which was useful to protect the LEDs and also to help hold them in place inside the handbag. I chose the APA102-based strips, rather than the more common WS2812 (called NeoPixel on Adafruit), because the timing on the APA102 strips is more flexible (they communicate with separate wires for Data and Clock, while the WS2812 strips communicate with complicated timing over a single wire), and they work with a wider variety of micro controllers.
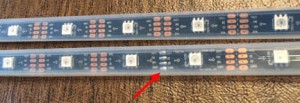
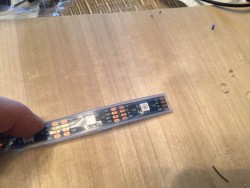
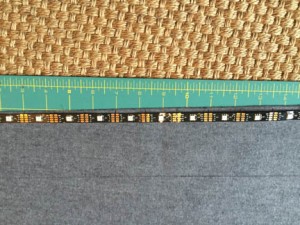
I ordered the 30 LED/meter strip, which has a spacing of 1.33″ between LEDs. Having LEDs only on the front of the purse works out to about 10 LEDs per row. I assumed that with 6 rows giving 60 LEDs total, I could get by with ordering 2 meters × 30 LEDs/meter = 60 LEDs. What I didn’t realize is that the strips have a join every 1/2 meter which affects the spacing (see image) . In order to get six evenly spaced rows of 10 LEDs, I needed to order three meters of the LED strip and cut the six individual 10-LED segments from between the 1/2 meter joins. I hope to be able to use the leftover pieces in a later project.
Cutting and soldering the strips:
The strips are easy to cut into pieces with a wire cutter. Just cut along the dotted lines between the solder pads. Cut though the weather proof sleeve and the LED strips at the same time. When you order the APA102C strips, the ends come with 4-wire JST connectors attached, so two of the strips I cut already had connectors on them. Rather than soldering wires to directly connect the 6 strips, I decided to solder additional 4-pin JST connectors to the ends of each strip and attach the strips together with the connectors. This way if I made a mistake or a strip died, it could be swapped out. If you prefer, you can connect each of the strips together by soldering wires directly to each strip.
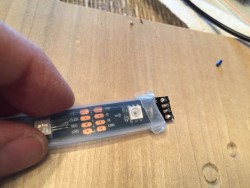
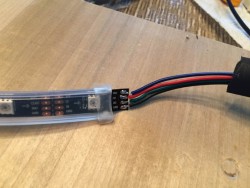
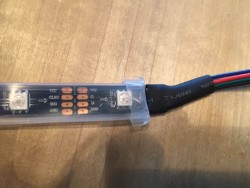
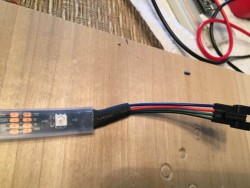
The strips are directional and have arrows to show the direction in which the signals travel. I soldered the female JST connectors to the strip inputs and the male JST connectors to the strip outputs. The steps for soldering are shown in the pictures below. (1) First fold back the silicone sleeve to get access to the solder pads. (2) Heat each of the solder pads enough with the soldering iron to get a blob of solder to stick to them. (3) Trim the JST connector to the right length, strip the ends of the wires and tin the tips of the wires with the soldering iron. Place 1/2″ shrink tubing over the JST wires. (4) To connect the wires to the strip, put a tinned wire on top of a pad containing a blob of solder, and touch the hot soldering iron to the wire until it melts into the solder blob. Be sure you always connect the same color wires to the same solder pad (I always connected black to ground). (5) Cover the solder pad with the shrink tubing. (6) Heat the shrink tube until it contracts around the connection. (7) Flip back the silicone sleeve over the solder pad.
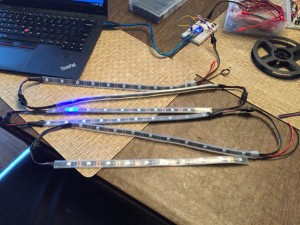
When you are done adding JST connectors to all the wires, you can join them and test out all your connections by running a sample program. I used an Arduino Nano I had lying around, and ran the Adafruit Strandtest program (https://github.com/adafruit/Adafruit_DotStar) to make sure I had good connections and all the LEDs worked. Wiring for Strandtest is easy – just connect the strip’s power, ground, data and clock to Arduino 5V, ground, Pin 4 and Pin 5 respectively. (Note that the LED strip should usually have its own power supply, but the Strandtest program requres very little current to run, so you can power the LEDs directly from the Arduino in this case) If everything is wired correctly, all the LEDs should take turns lighting up in different colors.
Making the Handbag:
To attempt this part of project it helps to have some familiarity with a sewing machine and its different attachments. I have limited sewing experience, so I made a couple of practice (non-electronic) handbags first, just to figure out the best ways to attach the various pieces and sew the vinyl fabric. The practice was very helpful in figuring out the right design and fabrication elements for the final handbag.
Sewing Tools:
- Sewing machine
- Walking foot attachment
- Zipper foot attachment
- (optional) Teflon foot – may be helpful if your vinyl sticks under the sewing machine foot.
- Leather sewing machine needle
- Rotary cutter, cutting mat and cutting guide
- Eyelet setting tools for 6 mm eyelets
- Fabric scissors (embroidery scissors will be helpful too)
Handbag Components:
- Vinyl or leather (I used vinyl – much cheaper, and easier to sew)
- Accent fabric (at least 25.5″ × 4.5″ + possibly more for decorative elements)
- Lining fabric (could use same as accent fabric)
- Fusible backing (to stiffen thinner fabrics)
- (2) D-rings and (2) Swivel hooks
- (1) 24 – inch zipper
- Heavy-duty thread
- (1) Magnetic snap
- (60 plus extra for insurance) 6 mm eyelets with backings
- 1/2″ wide self adhesive Velcro (about 2.5 yards)
Vinyl – tracing and cutting the base:
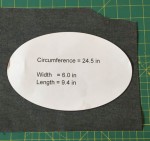
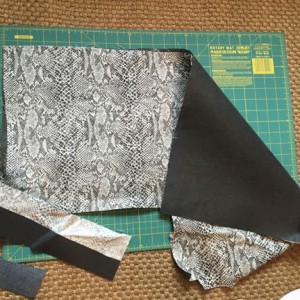
The handbag style is a bucket purse with an elliptical base. I used Inkscape to draw an ellipse the size of the desired bag footprint plus a 1/2 inch seam allowance. The SVG file is available on GitHub. The circumference of the ellipse dictates the length of the fabric for the body of the bag (25.5″ = 24.5″ + 2 × 1/2″ seam allowance). Trace the ellipse onto the wrong side of the vinyl and cut it out. You will need to do the same with the lining fabric.
Vinyl – marking and cutting the body:
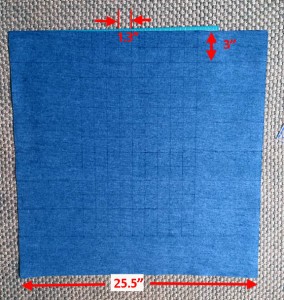
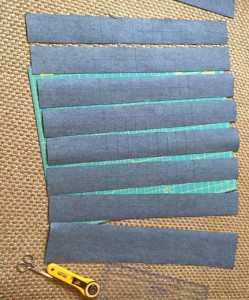
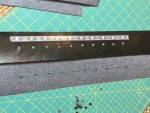
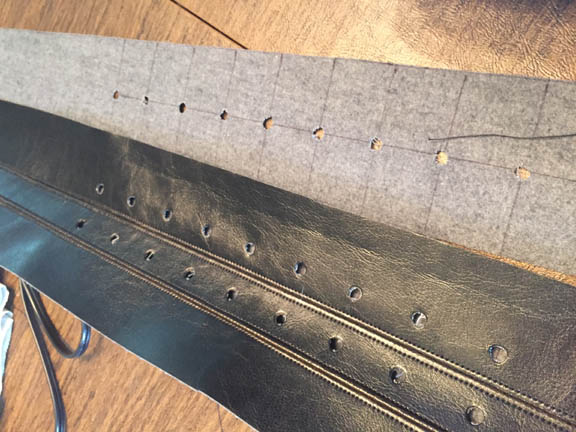
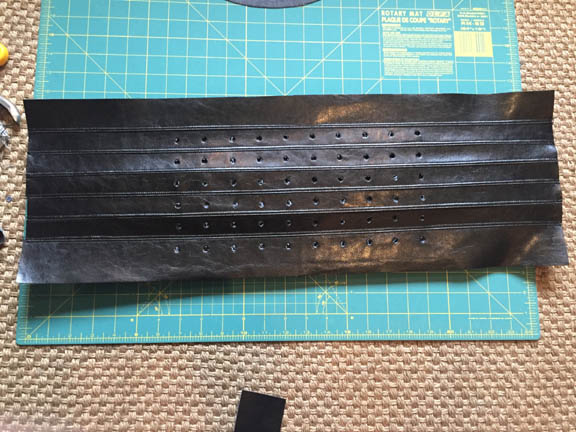
Mark out a rectangle of width 25.5 ” by 18 ” inches on the vinyl fabric. Subdivide it into 6 rectangular strips of 25.5″ × 3″. These 6 vinyl strips will hold the 6 LED strips in place. You’ll need to use one of the APA102c strips from the LED matrix to do the next measurements. Before cutting the fabric, mark the locations of the LEDs on the vinyl strips with intersecting lines. To do this, I aligned an LED strip in the middle of the large vinyl rectangle, and marked out the horizontal position of the LEDs at both the top and bottom of the fabric. I then drew vertical lines down the height of the fabric at the position of each LED. The LEDs strips will run along the middle of these vinyl strips, so draw a horizontal line down the middle of each 3″ strip. Once all lines are drawn, cut out the six 3″ high strips.
Vinyl – punching holes:
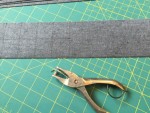
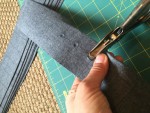
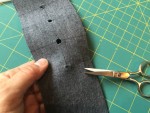
The intersecting lines on each fabric strip show where the eyelets for the LEDs will go, so you’ll need to punch holes there. I didn’t have a leather punch, which would be the preferred tool for this job, but I found that an old-fashioned hole punch made just the right size holes. The holes need to be big enough to allow the eyelet stem to go through, but small enough that there’s enough fabric around the hole for the for the eyelet to grip. This will be clearer later on. If the punched holes don’t go all the way through, finish cutting them out with scissors.
Vinyl – additional pieces:
Mark and cut two additional 25.5″ long strips from the vinyl. One is 2.5″ tall, to go below the vinyl strips with the LEDS, and one 3″ tall to form the top border of the handbag.
To summarize – in case this has been confusing – you will need to end up with following pieces cut from the vinyl:
- (1) elliptical base (shown above)
- (6) 25.5″ x 3″ strips, marked and punched with holes for LEDs
- (1) 25.5″ x 2.5″ strip to attach base of bag to LED strips
- (1) 25.5″ x 3″ strip to form upper border of bag
Sewing tips for vinyl:
Sewing thick fabrics like vinyl and leather can be tricky. When sewing the vinyl, I recommend using a leather needle for your sewing machine. They are designed to puncture through thick layers of fabric better than regular needles and will be less likely to break.

Depending on the texture of the leather/vinyl you use, you may find it sticks under the sewing machine food when you sew the top side, in which case a Teflon sewing foot will be useful. I actually didn’t have a problem with sticking but have seen others warn about it.
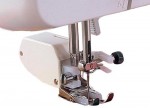
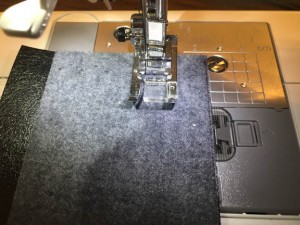
When you get to sewing through multiple layers of fabric and vinyl, a walking foot attachment for your machine will be essential. The walking foot helps feed the fabric under the foot at the same rate from the top and bottom and keeps it moving through smoothly, even when it is quite thick. Quilters often use the walking foot when sewing through thick batting.
I strongly recommend practicing sewing on some scrap pieces of the vinyl before starting on the handbag. You may need to adjust the tension in the thread to get the stitches to look good on both sides of the fabric, and you can see how well the different kinds of sewing machine feet work on your material.
Vinyl – sewing the body:
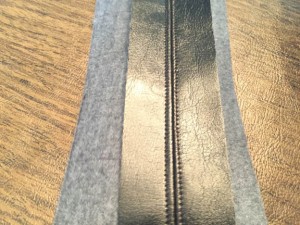
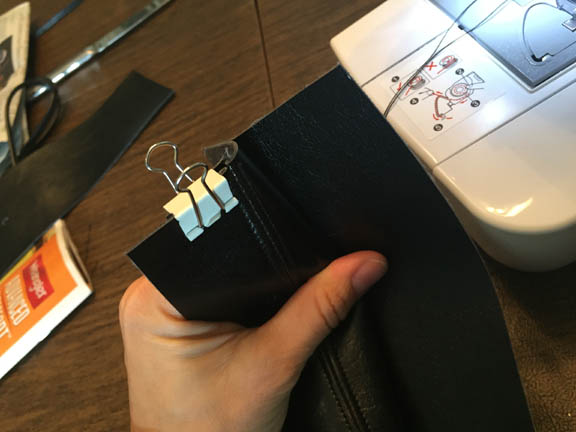
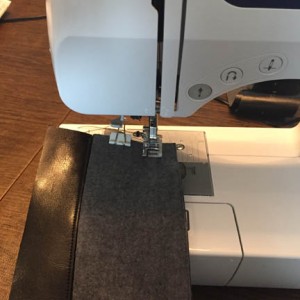
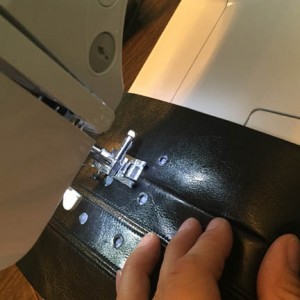
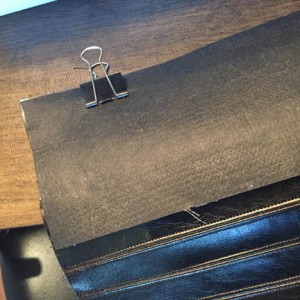
First, take one of the 3″ tall hole-punched strips and place it right side together with the 2.5″ vinyl strip. Don’t pin the strips together as this will make permanent holes in the vinyl. Binder clips work well to hold the pieces together. Sew the two pieces together with a 1″ seam allowance (this is purposefully a big seam allowance, which will be important later) using heavy-duty thread. Flatten out the seam allowances and top stitch them the entire way down the strip. You can’t iron vinyl, so you will have to physically hold the seam allowances open while you do the top stitching
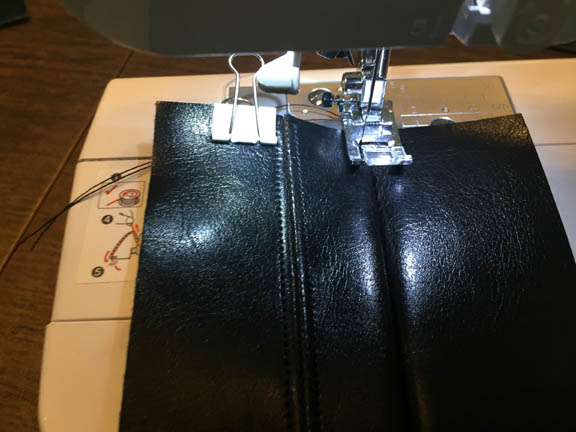
Now take another of the 3″ hole-punched vinyl strips, and attach it, right sides together, to the other side of the 3″ strip you’ve just sewn. The seam allowance you previously sewed may get in the way, so you will have to push it out of the way with your fingers, or you may be able to use binder clips to pin it partially out of the way. Now sew these strips together with a 1″ seam allowance. After sewing, fold open the seam (don’t iron!) and top stitch the allowances down.
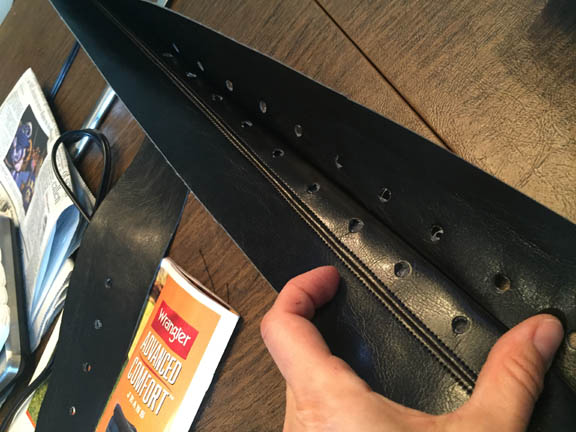
Continue doing this with each of the hole-punched strips. Join right sides of strips together and sew with a 1″ seam allowance, then flatten and top stitch the seams down. Be sure to push any other seam allowances out of the way when you are top stitching.
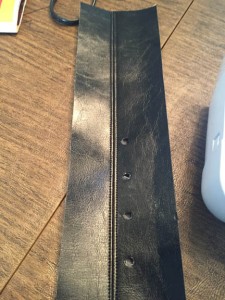
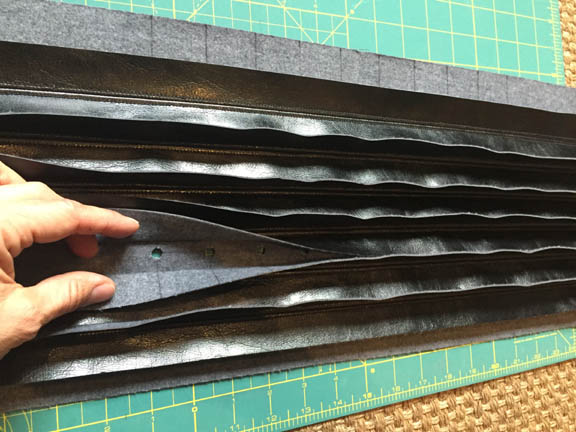
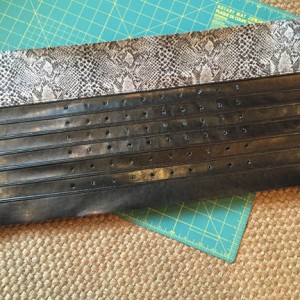
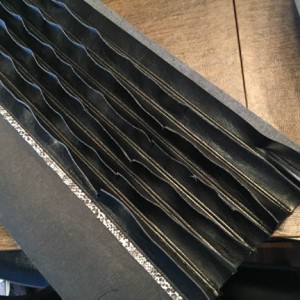
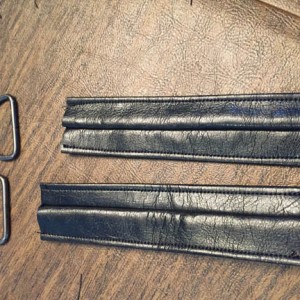
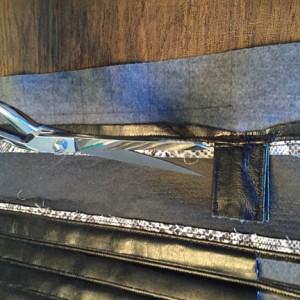
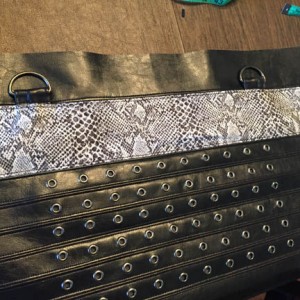
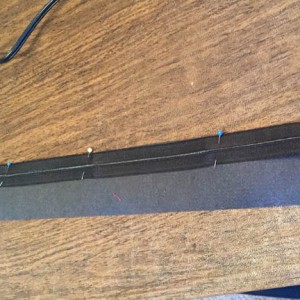
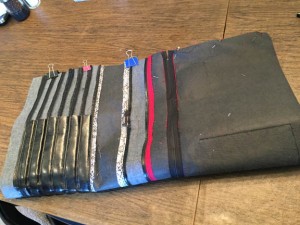
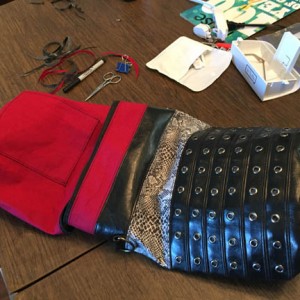
When you are done, you should have a panel that looks like the one below (the channels created by the long seam allowances will help hold the LED strips in place:
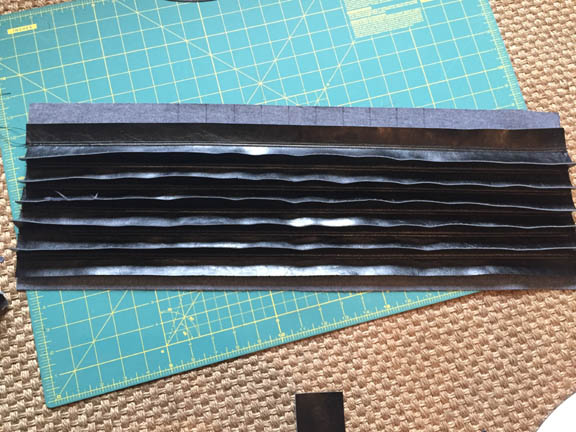
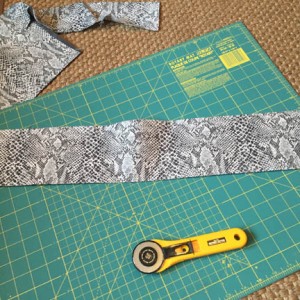
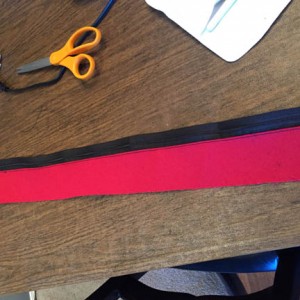
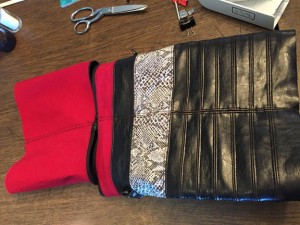
Now we’re going to attach the accent fabric to the vinyl body. I found a snakeskin print cotton I really liked, but it was quite thin, so I attached a black iron-on fusible backing to the fabric before cutting it to provide more structure. Cut a rectangular piece of the fused accent fabric that is 25.5″ long by 4.5″ high. Now attach it with binder clips to the last punched vinyl strip that was added, right sides together, and sew them with a 1″ seam allowance. Again, top stitch down both sides of the seam.
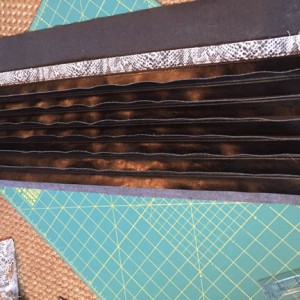
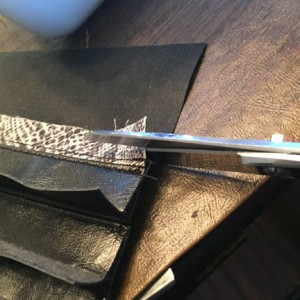
Next, flip the panel over and trim back the seam allowance of the accent fabric, but leave the full 1″ seam allowance of the vinyl intact.
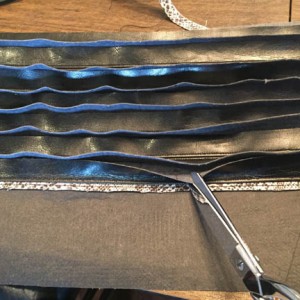
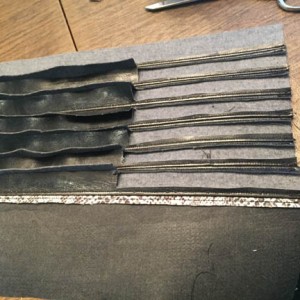
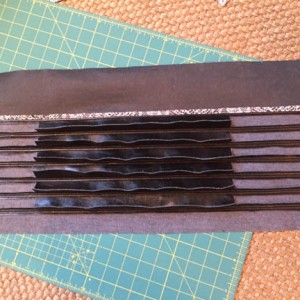
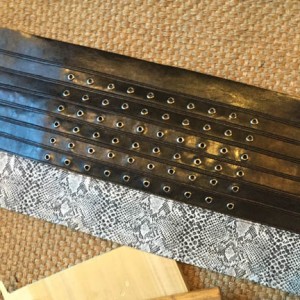
The long seam allowances in the back side form channels that will help to hold the LED strips in place. At this point, trim away the sides of the extra seam allowance so the channels are just long enough to hold the LED strips, but not so long that they will make the body of the bag too stiff. Snip down into the vinyl seam allowances about 1/2 inch outside the outermost holes and cut along the allowance to trim the extra fabric.
Adding eyelets:
The next step is to add the eyelets. Adding them earlier would have gotten in the way of the sewing machine foot when sewing the vinyl strips together. It’s a good idea to practice with eyelets on a scrap piece of fabric before doing it on the actual handbag. (Here’s an Instructable on how to set an eyelet)
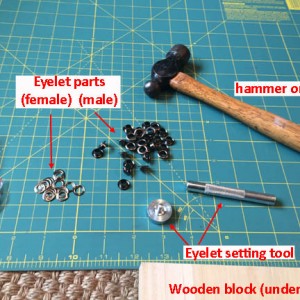
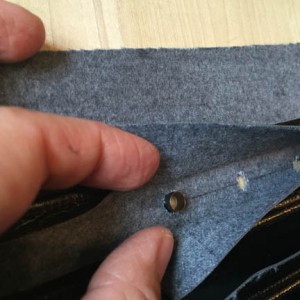
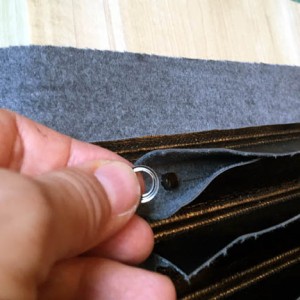
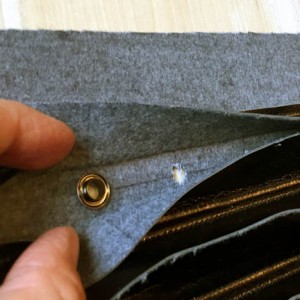
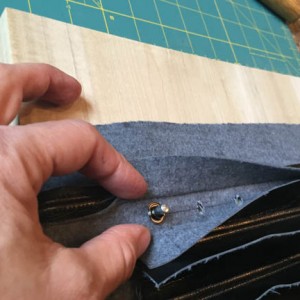
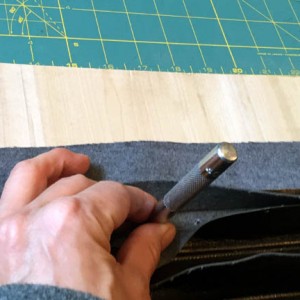
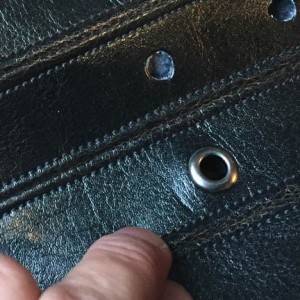
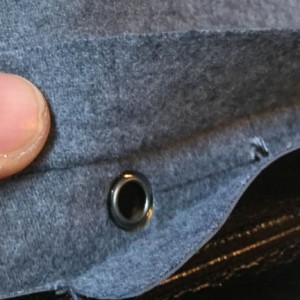
Each eyelet consists of two parts. Push the male end through the hole from the right side of the vinyl, then place the female piece over the end of the male with the curvature cupped away from the male end. Place the anvil of the setting tool through the eyelet from the male end, then place the top of the setting tool over the anvil and hit it firmly several times with a hammer or mallet. The anvil should be resting on a block of wood or some similar surface when you strike the setting tool. This will bend the male eyelet piece over the female piece and hold it in place. Check that the eyelet is securely attached to the fabric, and hit it again if it isn’t. Repeat for all 60 holes.
Adding Velcro:
Attach the self-adhesive 1/2″ wide Velcro strips to both sides of each channel formed by the long seam allowances. These will join together to hold the LED strips in place inside the channel. I didn’t take any pictures of this part of the process, but will try to describe it clearly. Use the self-adhesive Velcro from the fabric store, and trim it into six strips the same length as the channels. Each Velcro strip has a hook side and a loop side. For each of the six channels, push down one of the seam allowances so that it covers the eyelets, and stick the loop side of the Velcro on the top (right side) of that first seam allowance. Then for the seam allowance on the other side of the channel, stick the hook side of the Velcro to the wrong side of the allowance, so that you can lay the second allowance on top of the first and they will hook together. The adhesive will be enough to hold the Velcro in place. Don’t try to sew it down – it just gums up the needle and the sewing machine (don’t ask how I know!)
Sew on top border and attach the D-rings:
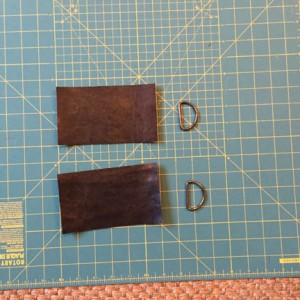
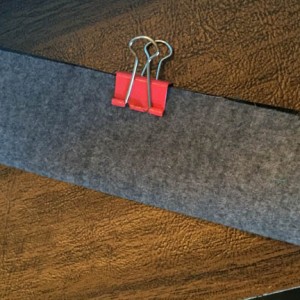
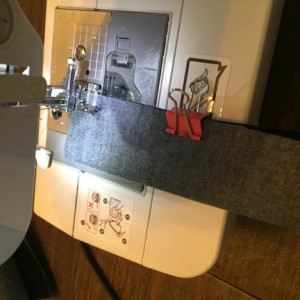
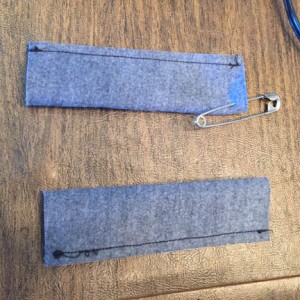
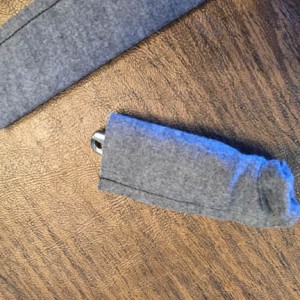
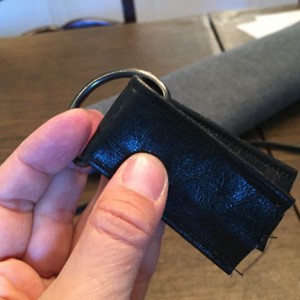
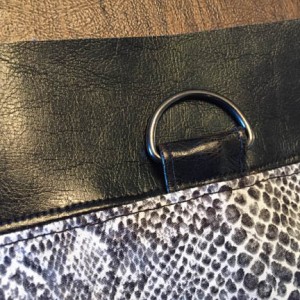
Two D-rings on the sides of the handbag will provide places to attach a shoulder strap. First we’ll sew two small straps to attach the D rings to the body of the bag. My D-rings had a width of 1.5″, so I cut strips of vinyl that were 4″ wide (2 × 1.5″ + 1/2″ seam allowance) and a few inches long (I made mine much too long, but the excess just gets trimmed away later). Fold each strip width-wise and sew a 1/2″ seam along the length of the strip to make a small strap. Invert the small strap (I clip on a large safety pin and pull it through the middle). Roll the strap so that the seam is in the middle, and top stitch down both sides. Then wrap the strap through the D-ring in preparation to attach it to the handbag. Do this for both D-rings.
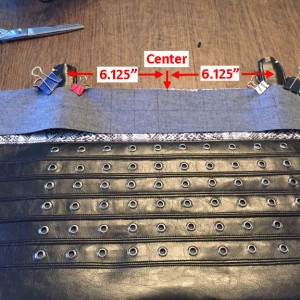
You’ll need to figure out where the straps will attach to the purse. The circumference of the purse (without seam allowance) is 24.5 inches, so each strap is centered 24.5″ ÷ 4 = 6.125″ from the center of the body. If it’s easier, try to wrap the body in to an oval shape around the base, and eyeball where the straps will go. Clip the straps into place.
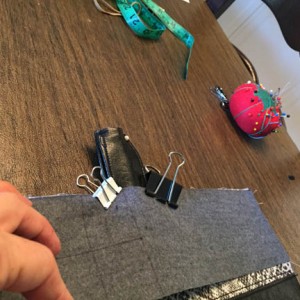
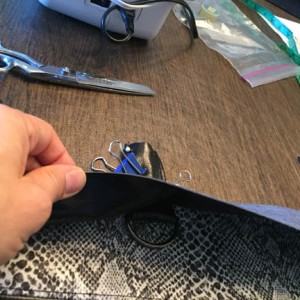
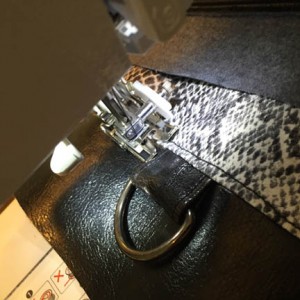
If you haven’t been using it all along, you will definitely need your sewing machine’s walking foot for this part of the sewing, because when we get to the straps we will be sewing through many layers of vinyl. It is a good idea to use the leather sewing machine needle as well. Join the accent fabric and the last 3″ vinyl strip (the one without holes) with right sides together and the D-ring straps sandwiched between the vinyl and fabric. I used binder clips to hold the D-ring straps in place. Sew along the edge with a 1/2″ seam. Then open up the seam and top stitch all around, stitching over the accent fabric side first. Be sure that when you top stitch that the D-ring straps are lying flat with the strap loop laying flat over the vinyl. When you do the top stitching on the vinyl side of the seam, depending on the size of the loop you left hanging out, you may have trouble sewing too close to the D-ring. If so, stop the top stitching just before each loop, and start up again on the other side of the loop. Trim any extra length of strap that is hanging out the back.
Lining – Cut the fabric:
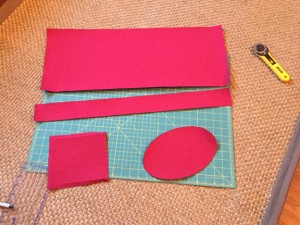
I chose a plain red cotton fabric for the handbag lining. Unless the fabric is fairly thick, iron on a fusible backing to give it some stiffness. A zipper in the lining allows access to the electronics. Cut the following pieces from the lining fabric.
- (1) Elliptical base (same as for the vinyl)
- (1) 25.5″ × 3 ” strip
- (1) 25.5″ × 9 ” strip (this is purposely a bit too long and will be trimmed later)
- (1) 6 ” x 6 ” (approx) piece for a pocket – cut this piece for whatever size pocket you want
Lining – Sew the pocket:
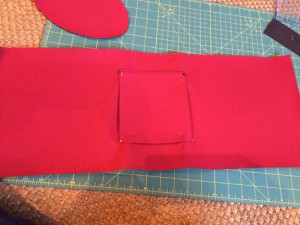
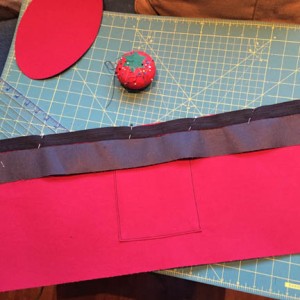
Full disclosure – I have no idea how one is actually supposed to sew an interior purse pocket, so if you have a better method – feel free to use it here. All I did was fold over about 3/8″ on the top side of the pocket and hem it down. Then I folded under the two sides by a 3/8 ” margin, and folded the bottom up and under by about 3/8″. I then pinned the pocket to the middle of the large lining strip, and sewed around the three sides that hadn’t been hemmed. It’s not gorgeous, but it’s functional.
Lining – Add the zipper:
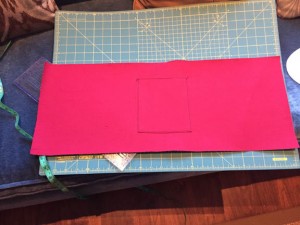
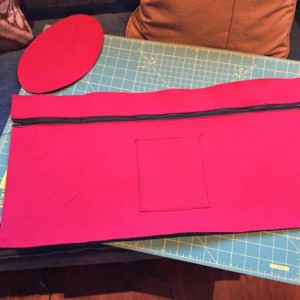
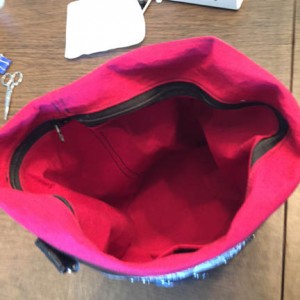
More disclosure – I never learned the proper way to attach a zipper, so if you you prefer a different method, use it. What I did worked fine, so I’ll describe it here. You’ll want to use the zipper foot on your sewing machine for this step. Sew four seams, documented in the images below: (1) Pin zipper to thin lining strip with the right sides together and sew together with the zipper foot – the seam allowance was about 1/4″. (2) Fold up the zipper and top stitch the seam at about 1/8″ so that it lies flat. (3) Pin the zipper and thin lining strip right sides together to the large lining piece as shown and sew with about a 1/4″ seam allowance. (4) Fold the zipper and thin lining strip up and top stitch at about 1/8″ so that it lies flat.
The zipper I got does not fully unzip into two separate pieces, so I can’t fully remove the lining to access the electronics. I can unzip it most of the way and push the lining out of the way, which seems to work fine, however if you’d like to get a zipper which zips all the way apart, that will work as well.
Attach lining to handbag body:
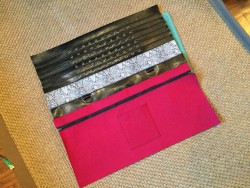
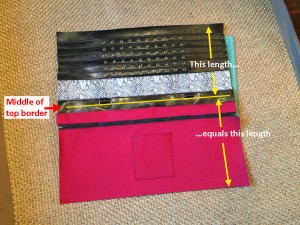
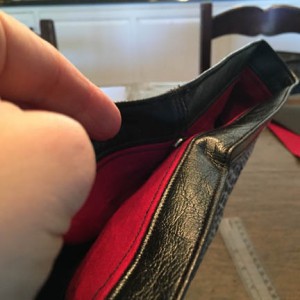
This is straightforward. Clip (with binder clips) the lining and the body of the bag with right sides together at the top and sew with a 1/2″ seam. When you sew this seam, be careful that the D-rings aren’t in the way. Be sure to fold them down before you sew. Then (you guessed it!) top stitch along both sides of the seam. Trim the excess seam allowance.
I didn’t take any pictures of doing this, but now that the lining is attached, make sure it isn’t too long (you don’t want it to bunch up inside the handbag). Fold the bag in half lengthwise along the upper vinyl border (exactly down the middle). If the lining extends past the vinyl, then it is too long. Mark the lining where it just reaches the bottom of the vinyl body, and trim it back so that it is even with the vinyl. If this isn’t clear, I’ve tried to illustrate the concept in the picture on the right.
Sew the handbag body closed:
This will absolutely require the walking foot on your sewing machine and you should use a leather needle as well if you have one. You will be sewing through some thick layers of vinyl. Fold the body of the purse in half width-wise (see image below). You can pin the lining halves together, and use binder clips to hold the vinyl body halves together. When joining the halves do the best you can to line up the top stitched seams on both sides with each other. The final handbag will look a lot neater if you do. Sew a 1/2″ seam from the bottom of the lining to the zipper, then stop. Then sew another 1/2″ seam from the bottom of the vinyl up to the zipper. Turn the bag inside out. This will be difficult, but do your best to top stitch (are you sick of top stitching yet?) along both sides of the vertical seams you just sewed. You will probably have to bunch the bag fabric up quite a bit to top stitch all the way up, but it is possible. It’s worth it because it makes the line of the bag much smoother.
Sew the bottom:
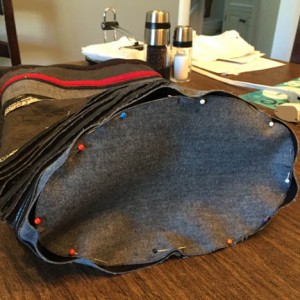
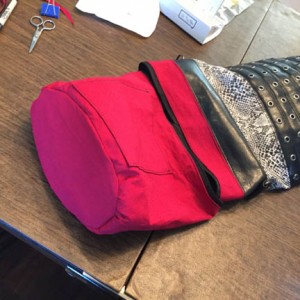
Turn the handbag back inside out and pin the elliptical bottom of the purse to the main body. I used pins instead of binder clips, but pinned the them together at the edges where the pinholes will be inside the seam allowance. It’s tricky to sew these pieces together, so go slowly and use your hands to push the pieces in position as best you can. Sew them together with a 1/2″ seam allowance. Pin and sew the elliptical bottom to the lining as well (I have no pictures of this process, but do the same as for the vinyl). Once they are sewn, trim the seam allowance at the bottom. Then unzip the zipper and turn the bag right side out through the zipper.
Top stitch the upper border:
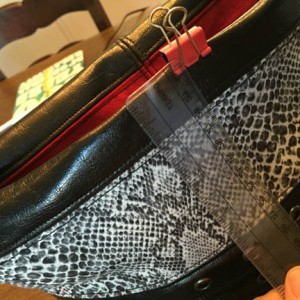
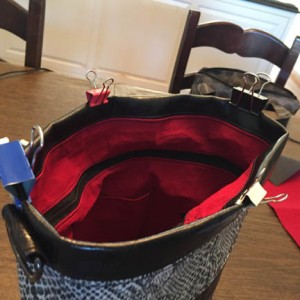
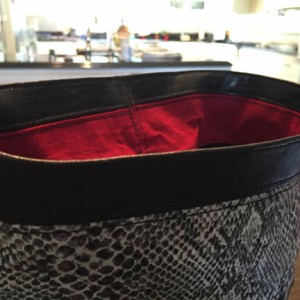
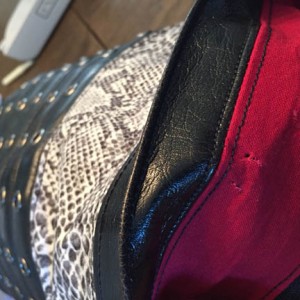
Now that the bag is right side out, push the lining into the handbag and fold the top vinyl border in half. Use a ruler to measure it all around and make sure that exactly one inch of the border shows on the outside of the bag. Clip the border in place with binder clips and top stitch around the border to hold it in place.
Add the snaps:
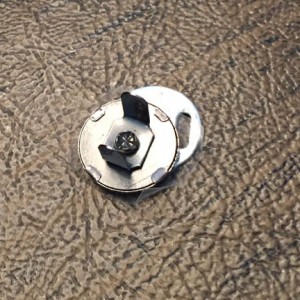
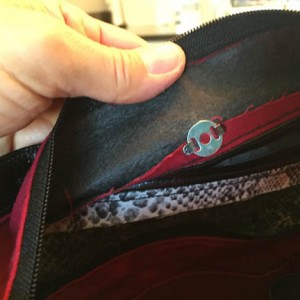
If you want the bag to be able to stay closed, you’ll need to add snaps of some sort. I used magnetic snaps just inside the opening. They were pretty easy to install. Just pick two points on opposite sides of the bag for the halves of the snap. Each side of the snap has two prongs that need to poke through the lining and are held in place by folding the prongs through a backing plate. Unzip the zipper to access the inside of the lining, and poke holes for the snap prongs through the lining just below where the vinyl ends. Push the prongs through the lining and backing plate and bend them outwards to hold the snap in place. That’s it!
Sew a shoulder strap:
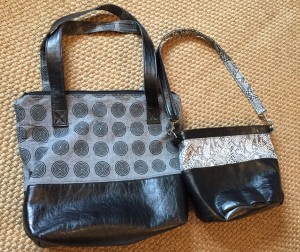
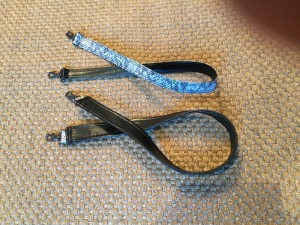
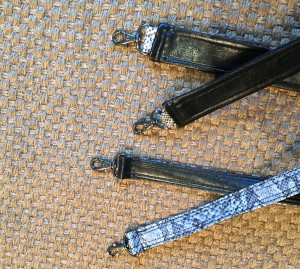
You’ll need a shoulder strap to be able to wear the handbag. I ended up with some stitching issues on the first shoulder strap, so I sewed a second one. Pictures of the straps I made are below. They both attach to the D-rings with swivel hooks.
This post is very long, and there are many good tutorials out there on how to sew handbag straps, so I’ll refer you to the following:
- http://emmalinebags.blogspot.com/2012/02/make-your-own-vinylleather-look-handbag.html
- http://paradisodesigns.blogspot.com/2011/01/method-monday-tutorial-on-pleathervinyl.html
- http://pinktulipza.blogspot.co.il/2009/07/make-your-own-faux-leather-purse.html
And…. finally – the finished handbag:
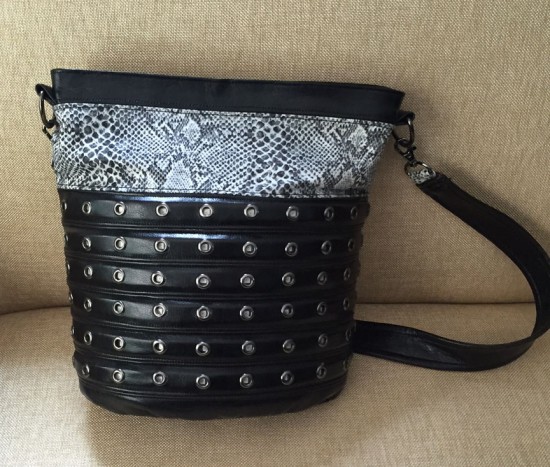
Hardware:
After spending so much time documenting the sewing, I got a little burnt out, so pictures of the electronics are somewhat sparse. Hopefully the descriptions will suffice.
Hardware Components:
- Teensy 3.2
- Adafruit Bluefruit LE UART Friend Bluetooth module
- Logic level converter
- Perfboard and wires
- Terminal block to barrel jack connector
- Case for the electronics (Mine is 3D printed)
- 5V portable phone charger
- USB A to barrel jack connector
I chose a Teensy 3.2 as a controller because I’ve used them in previous projects to control an LED matrix as run graphics on a TFT screen. Teensy 3.2 has a small form factor with a lot of speed and memory. Computing and storing graphics patterns for an LED matrix can easily use up more memory than is found in a standard Arduino.
I wanted to be able to control the setup with my iPhone, so I chose an Adafruit Bluefruit LE UART Friend module to communicate via Bluetooth. Adafruit has a nice iPhone app which works with the Bluefruit modules in UART mode and has the built-in capability of subscribing to an MQTT feed. I could probably have achieved a smaller form factor for a slightly lower overall cost by purchasing an all-in-one controller/Bluetooth module like Adafruit’s Feather M0 Bluefruit LE and may consider that for a future version of this project.
The Teensy and Bluefruit both operate at 3.3 V, while the LED strip accepts signals at 5V, so a logic level converter is necessary for them to communicate safely. The one I had has a connection at one side for the HV (5V) signal and corresponding pins at the other side for the LV (3.3V) signal.
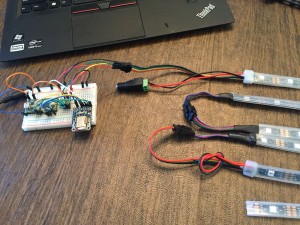
The first step in testing the electronics was to solder header pins to the Teensy, Bluefruit and logic converter and wire them up on a breadboard. The LED strip has 4 connectors for 5V, Ground, Data and Clock, plus an extra two wires for 5V and Ground. I connected a terminal block to barrel jack connector to the power wires and hooked them up to a 5 V wall adapter I had lying around. Then power/ground wires in the JST connector could provide power to the breadboard.
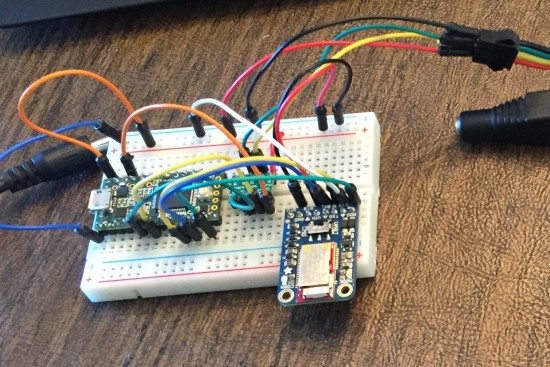
Wiring connections:
- Teensy Gnd -> Breadboard Ground
- Teensy Vin -> Breadboard 5V (This connection gets made only when the Teensy is not powered by USB connection to my laptop)
- Teensy 4 -> Voltage Adapter LV4 -> Voltage Adapter HV4 -> LED Strip Data
- Teensy 5 -> Voltage Adapter LV3 -> Voltage Adapter HV3 -> LED Strip Clock
- Teensy 9 (RX2) -> Bluefruit TXO
- Teensy 10 (TX2) -> Bluefruit RXI
- Teensy 12 -> Bluefruit Mode
- Teensy 3.3V -> Voltage Adapter LV
- 5V (Breadboard) -> Voltage Adapter HV
- Bluefruit GND -> Breadboard Ground
- Bluefruit Vin -> Breadboard 5V
- Bluefruit CTS -> Breadboard Ground
- Breadboard 5V -> LED Strip 5V
- Breadboard Ground -> LED Strip GND
The next step was to move the electronics to a more permanent housing, so I transferred all the connections to perf board, soldered them, and 3D printed a case. The case has a hole for the Mini USB connector, to connect to the Teensy for programming. It also contains a switch that controls whether the Teensy gets power from the 5V supply. While programming the Teensy, it gets power via USB, otherwise, it is powered from a 5V source – either a portable battery, or a wall adapter.
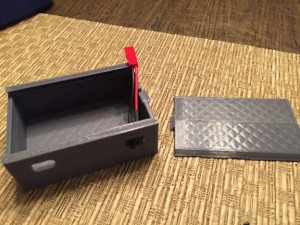
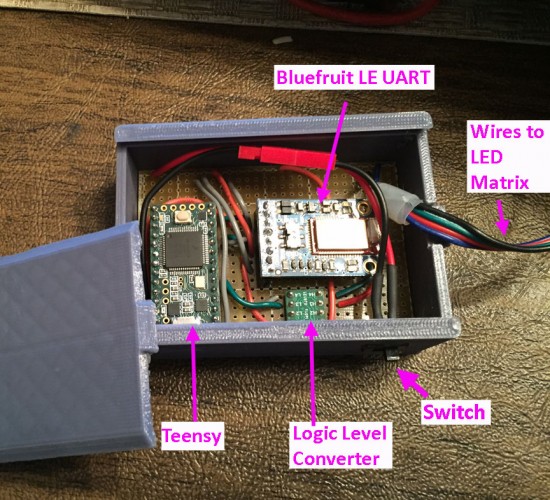
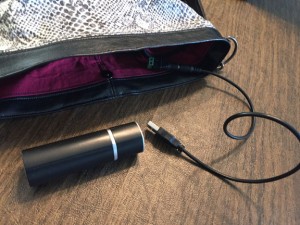
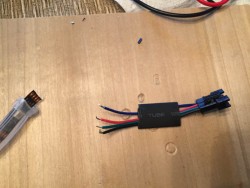
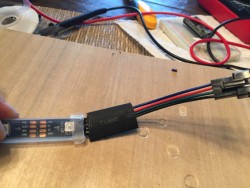
Once the electronics are finished and secure, then they can be installed in the handbag. Since I had made the LED strips modular, I placed them, one at a time into the velcro-secured channels inside the lining, then joined the JST connnectors together once they were all in place. Once the LED matrix was installed, I connected a USB to barrel jack cable to the barrel jack connector attached to the LED matrix power wires. (TBD – photos here) This allowed the electronics to be powered by a 5V portable phone charger. Finally, I connected the electronics to the LED matrix, and placed the case containing the electronics inside the lining of the bag. To turn everything on, I just had to connect the 5V phone charger to the power cable. (TBD!!!0
Coding/Software:
Coding: Getting Data From Twitter to Teensy
The simplest way I found to send Twitter feed data to the LED Matrix takes advantage of some useful services/apps offered by Adafruit.io and IFTTT.
Adafruit.io is essentially a free MQTT feed service with some nice bells and whistles attached to help you get started and to visualize and interact with your data. The service is still officially in beta, and is taken offline for service semi-regularly, so it’s not currently as reliable as some of the other (usually paid) services out there, however, it was good enough for my purposes.
IFTTT (If This Then That) is a free online web service, which, according to Wikipedia, “allows users to create chains of simple conditional statements, called ‘recipes’, which are triggered based on changes to other web services such as Gmail, Facebook, Instagram, and Pinterest.” In particular, IFTTT can take input from Twitter and send output to Adafruit.io.
Bluefruit App – Adafruit provides a Bluefruit app in both the Apple store and the Google Play store which can read directly from an MQTT feed and send it to a Bluefruit device.
The steps to set up the feed were:
- Create Adafruit.io account and make a feed (this link tells you how to set up an Adafruit.io feed)
- Create IFTTT account and connecte it to Adafruit
- Create IFTTT recipe that performs a Twitter search and writes the results to Adafruit. The search I used looks for any tweets with the hashtag “#wearables” and sends the Twitter handle of the person who wrote the tweet to ab Adafruit.io feed.
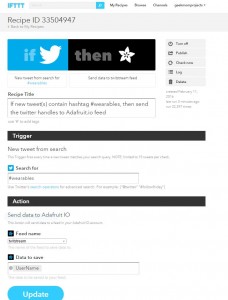
IFTTT Recipe to send Twitter search results to an Adafruit.io feed - Download the Adafruit Bluefruit app onto an iPhone, connect it to the Bluefruit module in UART mode, and enter Adafruit.io feed URL to subscribe to the Twitter search results.
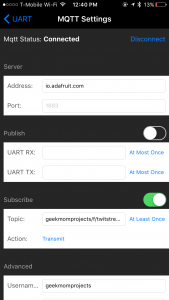
This gets the Twitter information written to the Bluefruit module. All that’s left is to program the Teensy to respond to the information it receives.
Coding: Arduino Code for the LED Matrix and Bluetooth
The Arduino IDE code used to program the Teensy 3.2 is on GitHub at https://github.com/geekmomprojects/led-handbag. When programming the Teensy, I found that the CPU speed needed to be set to 72 MHz or lower (Teensy 3.2 has a max CPU speed of 96 GHz) for the LEDs patterns to display correctly. I actually run it at 48 MHz, which works fine for all functions it needs to perform.
The Arduino code uses the FastLED library which provides a lot of nice functionality for controlling colors on individually addressable LED matrix strips.
The handbag scrolls any text it receives from the Bluefruit module. The exception is certain words preceded by the “!” character which are interpreted as commands. If there is no current text to be displayed, then the bag displays one of several patterns that have been programmed in.
By default, each text item gets displayed three times (the number of repetitions can be changed in the code). All text items to be displayed are stored in a circular buffer which tracks the number of remaining times each item is to be displayed, and places it back in the buffer if there are repetitions left, otherwise the text is removed from the buffer after being displayed.
It is challenging to make a readable font at such low resolution. I used a 6-pixel high font for the text display that I found online here: http://www.dafont.com/6px.font
In the “loop” portion of the Arduino sketch, the code checks for input from the Bluetooth module, processes it appropriately, depending on whether it’s a command, or text to be displayed, then proceeds to update the display if sufficient time has passed. An abstract base class provides functions to control the LED display, and several sub-classes provide different algorithms for display modes that scroll text, move a “snake” around the display or show falling “raindrops” among other things. It’s probably easiest to read the code directly to see how it all works.
Conclusion (finally!)
This was a really fun, if lengthy project to create and write-up. Wearables projects are terrific, though I don’t think we’re quite at the point where they can be integrated easily into every day usage, but I think we’re getting closer. Only a few years ago, I had to use conductive thread and multiplexing to create a single-color flexible LED matrix. This time around, it was much easier to use flexible individually addressable LED strips for a multi-color matrix. It will be interesting to see the continued evolution of wearables over the next few years.

I love you so much for posting this! For my cyborg costume project, I was going to use the exact same hardware combo you did (Teensy 3.2 and Bluefruit UART) only it was going to interface the part that used this combo with a raspberry pi instead of my phone since I need the power that the Teensy 3.2 provides to do real-time FFT. Thank you for providing this example!
Now I just need to figure out how to integrate all of that shiz onto a facemask…
Thank you so much for the nice feedback! I always love to hear that people are able to build off of what I’ve done, since I learn so much from other people’s project write ups. Good luck with your new project, and I know exactly how it feels to try to figure out where to store all the electronics in a wearable project. I’m sure it will be brilliant.