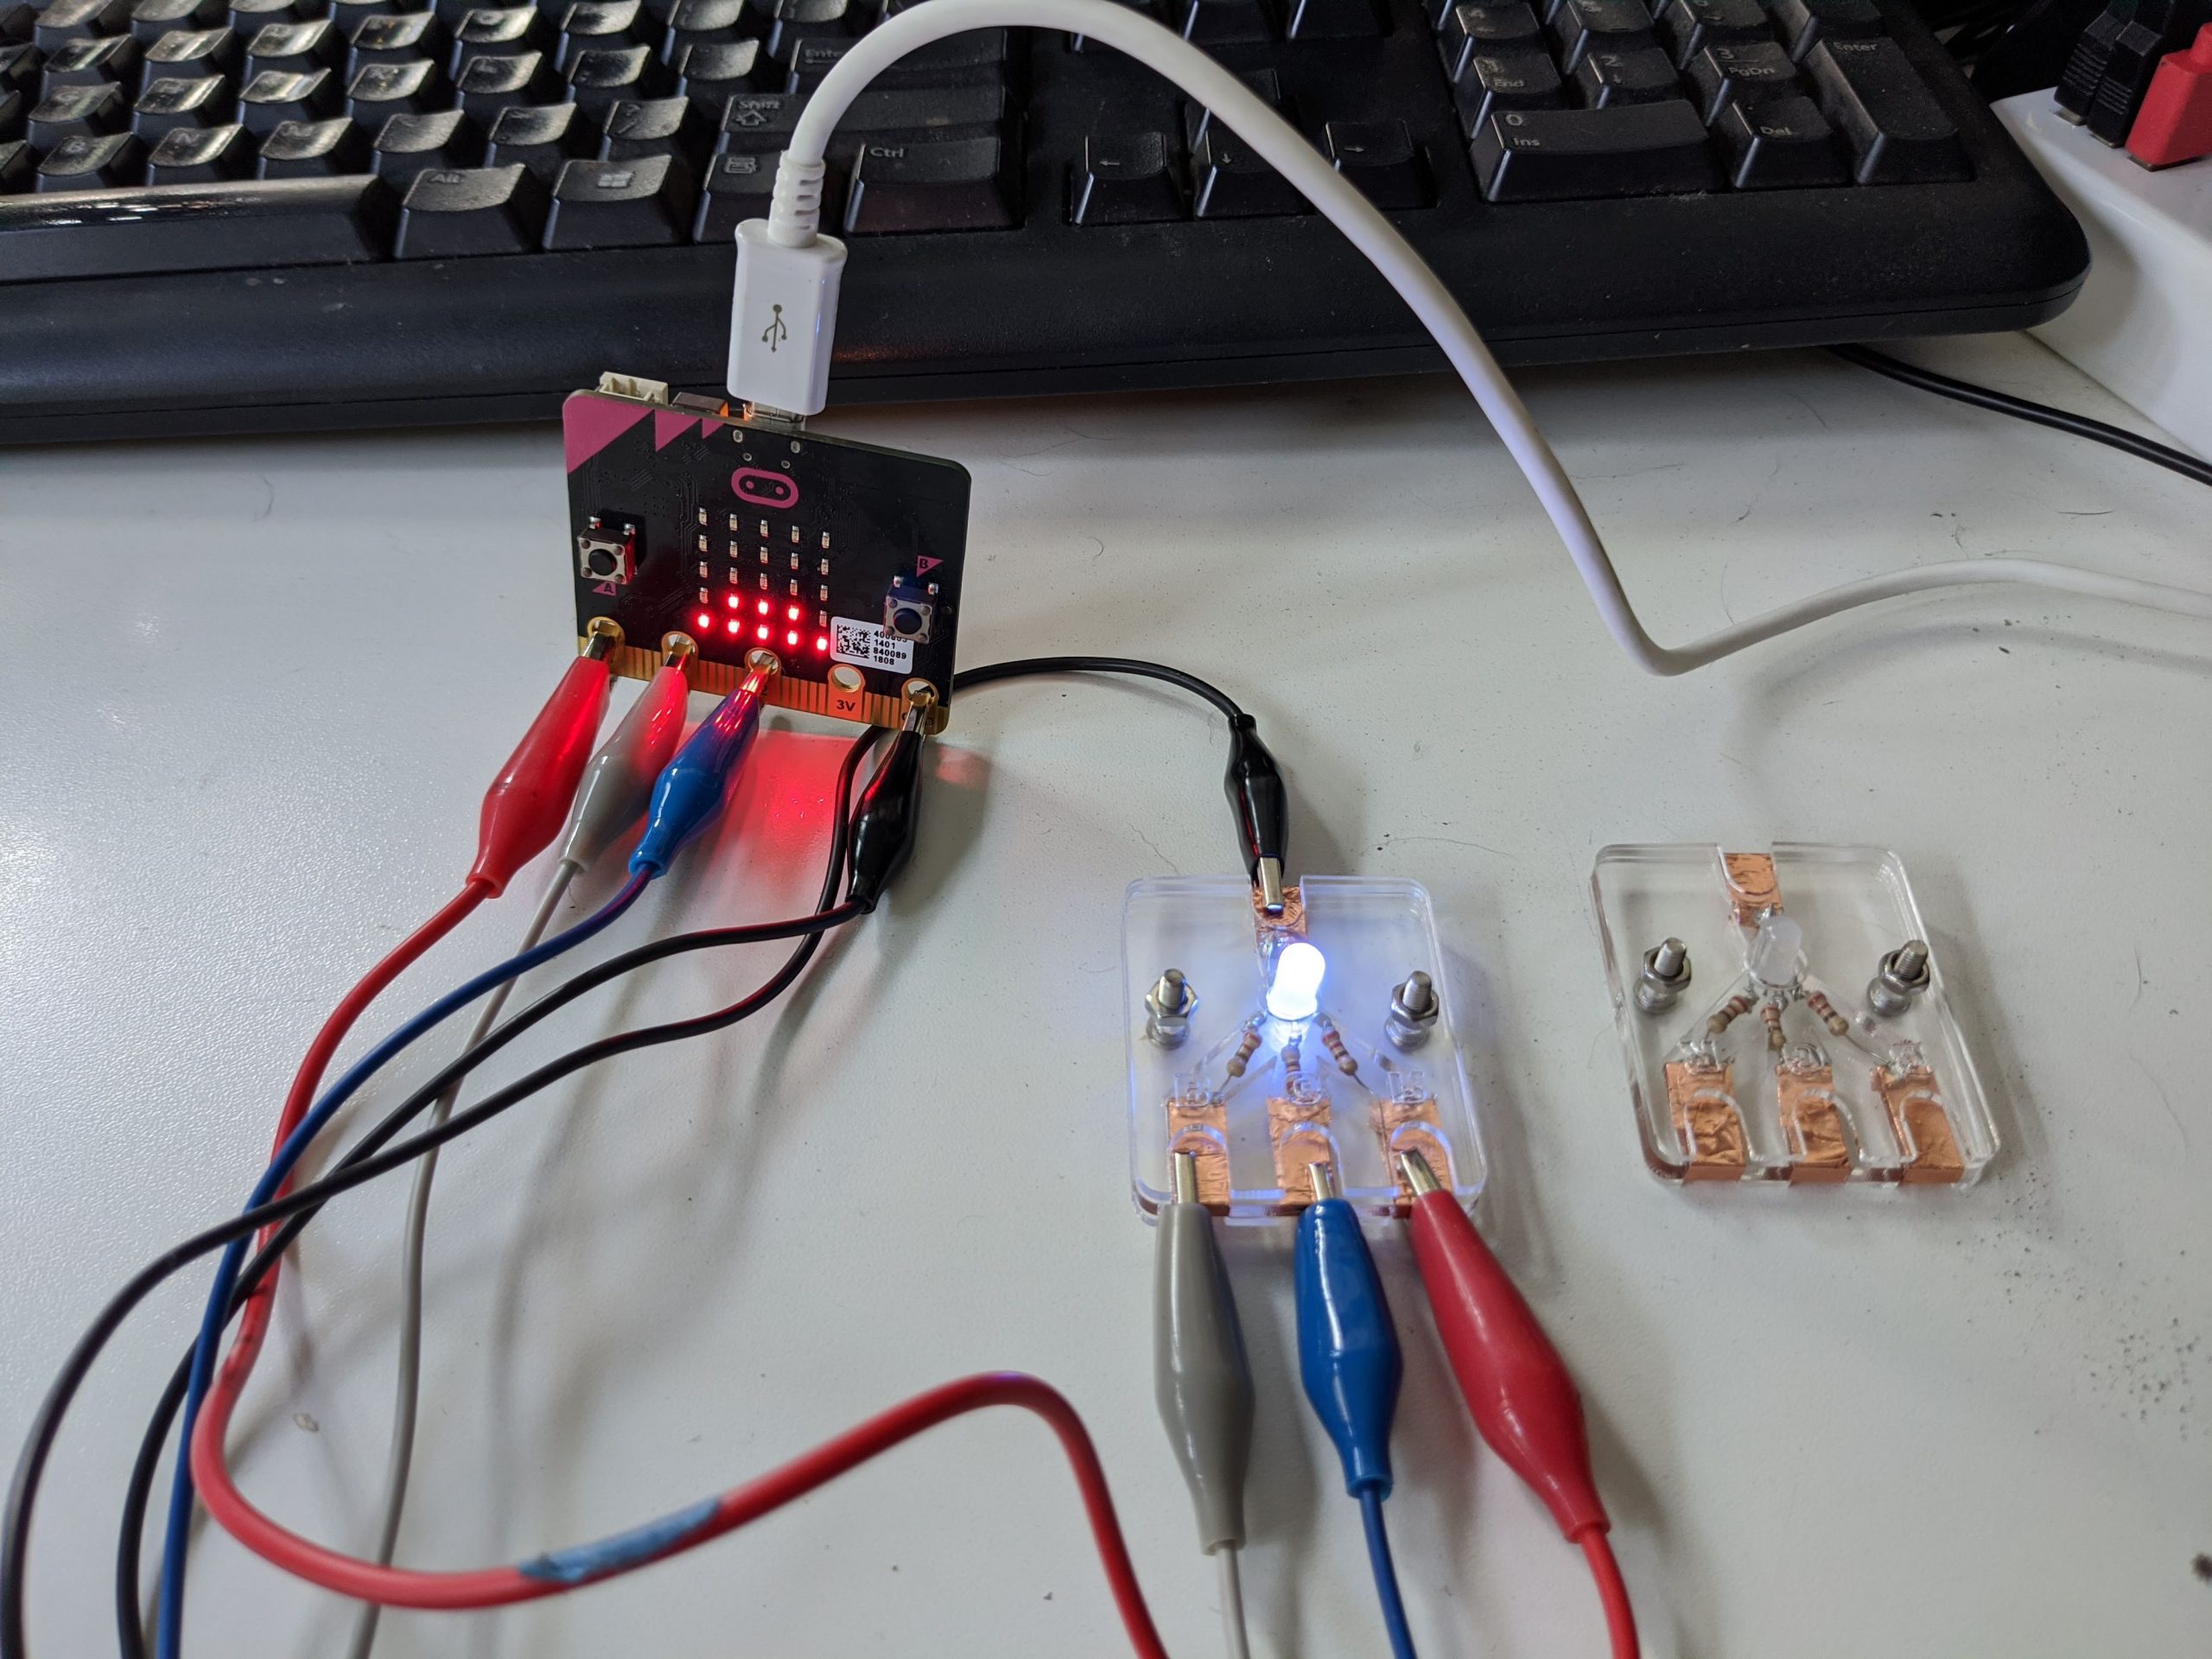
I recently wanted to do a micro:bit activity with RGB LEDs (the non-addressable kind). Because it’s a fiddly exercise to connect alligator clips to LED legs – especially with resistors involved, I created a case that allows for easy connection of clips to the LED.
Components
Materials:
- A small piece Acrylic for laser cutting (I used 1/16″ and 1/8″, but you could construct the case with only 1/8″ acrylic)
- 1/4″ copper tape
- RGB LED (common cathode)
- 3x low value resistors (I used 220 ohm)
- 2x M3 screws and nuts (I used 12mm screws, because that was the length I had, but anything from about 10mm to 16 mm should be fine)
Tools:
- Laser cutter
- Soldering iron/solder
Directions
Download and laser cut the three pieces of the case. Download the vector file from the link below:

In the file, the red lines are for etching and the blue lines are for cutting. I cut the dark blue piece from 1/8″ acrylic and the aqua blue piece from 1/16″ acrylic so the LED holder would be a little thinner, but you can cut all the pieces from 1/8″ acrylic as well.
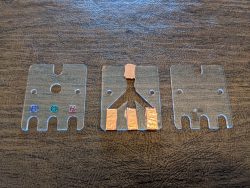
After cutting the LED pieces, wrap a layer of copper tape around the portions of the middle layer denoted by the red lines. These will connect to the LED legs.
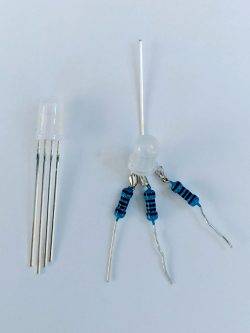
Take the RGB LED and bend the cathode leg in one direction, and the RGB legs in the opposite direction. Solder a resistor to each of the three RGB legs as shown, cutting off the extra lengths of wire in the resistor and LED legs.
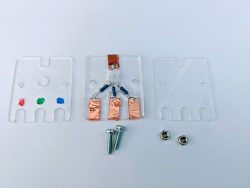
Then place the LED into the slots in the middle acrylic layer and solder the ends of the cathode and resistors to the copper tape. Snip off the wire past the solder joint.
Layer the three pieces of acrylic together so that the LED pokes up through the hole in the top piece of acrylic. Use the screws and nuts to secure them together. That’s it! Now you should be easily able to connect alligator clips to the LED legs without them wiggling around too much or sliding off.
